Hi Boox Popular Magazine 2024
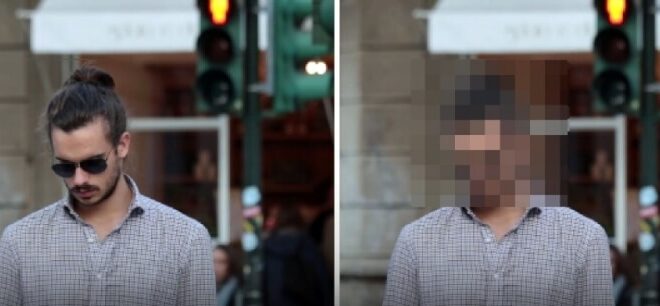
Filmora is a popular app to blur faces in the video (and a whole suite of other video editing features and functions!). Many vloggers and content creators use this unique feature to eliminate distractions from their content while protecting the privacy of those who happen to get in their shots. This means you’re no longer restricted to shooting videos in private places or having to worry about who might end up on camera, giving you a better path to video creation.
And in some cases, you may want to hide your own face on the videos you post online!
Whatever your reason for adding secrecy to your videos, you’ll be glad to know that the process is fairly straightforward. You can add blur effects to faces quickly and easily, even though it will look like you took hours making your video look professional.
Let’s look at how to blur faces in video using the Filmora app within minutes but for further reading, click here.
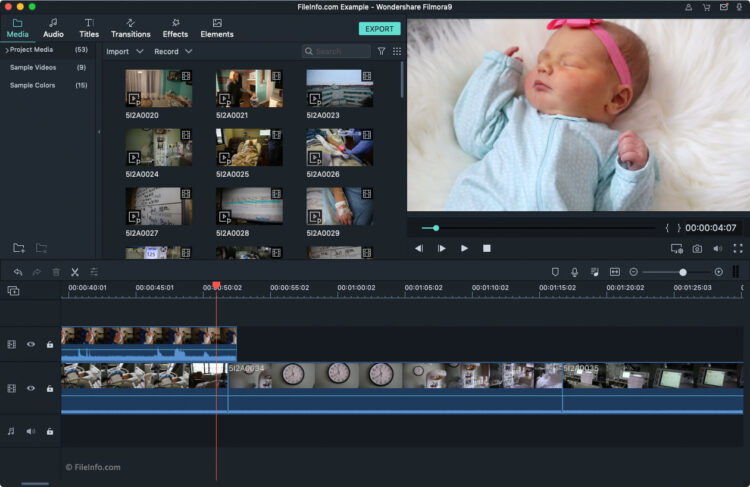
1. Load Your Media Files Into Filmora
Click on New Project and import your files into Filmora. You can drag and drop files directly from your media library. Filmora supports almost all audio and video file formats. Arrange your files on the video timeline to begin the process of blurring faces.
2. Use the Face-Off Tool
Filmora offers two unique tools to blur faces in the video. The first is the Face-Off tool, which is located on the Effects panel. Under Effects, go to the Filters menu and choose Utility. There, you should find a filter named Face-Off, which you can drag to your video file and apply it to the desired area. You’ll see the area become blurred with a mosaic pattern. That face or area will be blurred automatically throughout the video, meaning you don’t have to repeat this process frame by frame.
The Face-Off tool is a motion blur tool, which means that the targeted area will still be blurred even when people are moving.
You can also use the Face-Off tool to add a little fun and humor to your content. Double click the Face-Off filter in the timeline to reveal other options besides the mosaic effect. For example, you could choose an emoji face to replace the person’s real face, or an animal or even a paper bag. Have some fun with it to make your video stand out.
If you want to preview your changes, you can playback the video to see how your blurred face looks. Once you’re happy with the effects, click OK to apply the changes.
3. Use the Mosaic Tool
For faces or objects that aren’t moving, the Mosaic tool is an effective option. Under the Utility menu (located on the Effects tab under Filters), you’ll choose the Mosaic option, then drag the filter to your video timeline.
A yellow box will appear in the viewer, which you can drag and adjust to fit the desired blur target. Likewise, you can also use the slider bar to adjust the intensity of the mosaic and gain the desired effect.
To add another mosaic effect, simply click the Add button in the dialogue box and resize and adjust as needed. You can also delete mosaics from this same box.
Like the Face-Off tool, the mosaic effect will be applied throughout the video so that you don’t have to edit frame by frame. This can be a major time saver during the editing process and give you a high-quality video within minutes.
4. Play Back Your Changes
After you’ve applied your blurring techniques, it’s important to playback your video to see how the changes look. This is an important step to ensure you’re happy with the blur you’ve chosen and that it’s been applied to each face you wanted to block. If not, you can go back through steps 2 or 3 to fix any issues before saving and exporting your video.
5. Save and Export Your Video

Once you’re satisfied with the playback, you can click the Export option to save and export your video. Filmora can export videos in a variety of formats and resolutions, so explore your options on the menu before finalizing your project. You can post your new video directly to social media channels like YouTube, save to your computer, or burn to a DVD, all from within Filmora.
Try Filmora for Free!
The best way to see how Filmora can blur faces in the video and other features is to try it for yourself. Learn more about this here. Filmora offers a free 7-day trial that lets you experiment with the program in detail. Take advantage of a free trial today and see how easy it is to make professional-quality videos!