Hi Boox Popular Magazine 2024
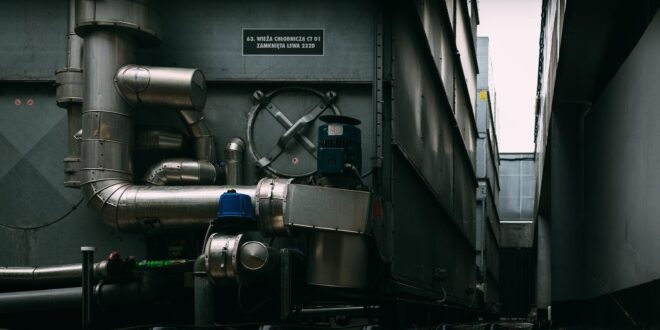
What is a furnace?
When asked to ‘turn up the heat’ or heater, you’re usually referring to the furnace.
The furnace is an enclosed structure made from metal, such as stainless steel or aluminum, with parts, motors, and ducts that assist in managing the flow and direction of the air. An is activated by changing the temperature on the thermostat and it is our primary source of comfort in the wintertime and on chilly days. HVAC technicians at Smile HVAC constantly repeat that proper care is needed to ensure your home stays warm which includes annual equipment checks and repairs as needed. Regular HVAC maintenance will ensure that your appliances work efficiently. It will allow you to spend less on your utility bills as well as get a piece of mind for your equipment.
What is a furnace used for?
Furnaces have timed ignition to aid with gradual temperature change and work efficiently to warm up the house. They hold the capacity to get as hot as 140°F-170°F. Regulated by the thermostat, through the forced-air model, the furnace delivers hot air into your home through a complex ignition process—heating the interior spaces in your house. The furnace isn’t only used in the winter season or cold months, but it generally helps to control the temperature in the house.
Due to the functionality of the model, there are some dangers, however. For one: the repetitive heating and cooling in the equipment can lead to cracks in the heat exchange, causing carbon monoxide to leak into your homes. And another issue is the combustible elements that can result in an explosion. This is why homeowners typically leave this line of work to professionals.
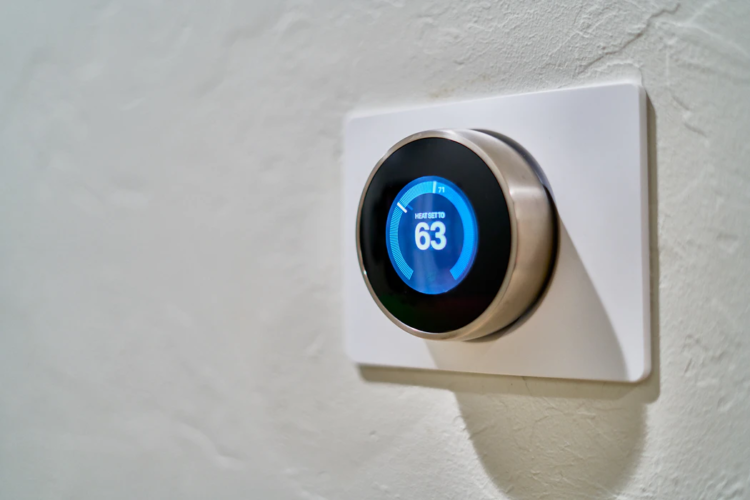
Photo by Dan LeFebvre on Unsplash
How to Install your Furnace
Before you begin this project, check with your insurance company, city (for laws and permits), and manufacturer’s warranty. Some cities may forbid work with gas to be done by unlicensed individuals and some manufacturers will make your warranty void for DIY jobs.
Ideally, you’ll want to install your equipment in the summer or spring. Try to avoid taking on the job just before winter, when you need it. Give yourself enough time to order the parts and get the work completed.
1. Size Matters
When replacing your old furnace, not any size will do. A small model, while more compact, may not be well suited for your home, and conversely, a large furnace might be a mismatch too. Although you can note the current size of your model, performing an assessment is better to ensure that you choose a furnace with the optimal size for your home.
If a unit is too small, it will not sufficiently heat the house and it will need to run longer. If a unit is too large, it can short cycle (heat up quickly, then shut down), rack up bills, temperature swings, Either way, an ill-fitted furnace will place stress on the system and cause it to break down or wear and tear faster. It also wastes resources such as time, money, and fuel.
Your furnace needs to match your house so the air can circulate throughout the whole home.
You’ll also want to look into the ducts.
A licensed contractor can help estimate the cost.
To estimate, we use the British Thermal Unit (BTU) to calculate. The general rule of thumb is 40-54BTUs of heat per square foot of your house. Typically, furnaces should be between 80,000 to 100,000 BTUs, but the size can change depending on the house.
There are many load calculators available online to help determine it.
2. Shut Off The Power
Start by shutting off the power with the shut-off valve and breaker.
You certainly don’t want the gas running while installing the new equipment (assuming you have a natural gas furnace): that’s asking for trouble. Ensure the duct doesn’t need replacing. Take note of the wiring. If the previous wiring was done correctly, it will help guide the wiring for the new furnace.
3. Connect Your Furnace
Most of the wires, pipes, and ducts should be there. Ensure that they aren’t broken or damaged. Then, line up the ducts and gas pipes with the furnace. You may need to attach doors, wires, latches, and switches to the internal furnace.
For older homes, heater ducts insulated with asbestos need to be disposed of with care.
Align the appliance where the old one used to be and use a clamp to connect it to the ductwork. Check to ensure it is secure. And attach the boot to it as well.
4. Connect the Gas
Once assembled, connect the furnace to the gas line. Then, use a gas-leak detector to check for leaks.
The furnace operates through the thermostat, so you’ll need to write the power supply and thermostat together. You should be able to follow the old wiring as a guide, but sometimes previous homeowners who also want to do it DIY can mess up the wiring. A professional can make the process smoother and ensure it is done right.
You’ll want to wait a bit, 5-10 minutes, before lighting the furnace. Follow the instructions and safety measures to a T.
5. Fire it up
Turn on the equipment. It needs to go through one initial cycle, but read the manual and manufacturer’s guide for more details.
Photo by Tekton on Unsplash
Although there may be a desire to do-it-yourself, installing a furnace is not only difficult but dangerous work. Working with natural gas means dealing with potential combustion and lethal gas, carbon monoxide. It’s highly advised that you use the help of the professionals unless you have proper training and all licenses needed to perform such kind of work.
Licensed Heating, Ventilation, and Air Conditioning (HVAC) technicians are equipped with the knowledge, education, and experience to safely install the furnace. Your safety is priceless. Nothing is better than the peace of mind of knowing a professional handled everything for you.