Hi Boox Popular Magazine 2024
You might be thinking that installing a washing machine and dryer typically requires a professional plumber for the job, but it doesn’t necessarily have to. As a matter of fact, the installation process with a washing machine and dryer is a straightforward process that even homeowners can do themselves.
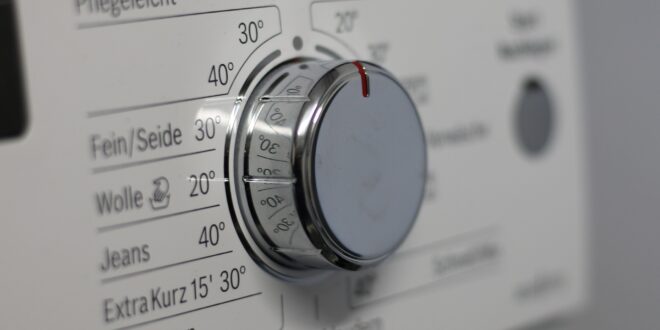
Of course, the setup procedure varies with each model of the washer and dryer. Fortunately, though, most of the models, including top-and-bottom and side-by-side ones, contain a general list of guidelines that need to be followed. However, for some of the more complicated installations, where you need to factor in ventilation systems, electrical outlets, or add new plumbing hookups, professional help like those from ballymore homes is mandatory. It may cost you a little extra, but it will save you up on more extensive repair costs if you mess up the installation process.
So if you feel you’re up to it, then use the following list of instructions when installing your washer and dryer:
How to Install a Washing Machine and Dryer
Prepare the Installation
The first thing you’re going to do before installing your washing machine and dryer is to measure the area you plan to place them in. Just make sure to give your dryer at least 4 inches of extra space in the back for venting.
You also need to consider the flooring type before placing the machines. For instance, we don’t recommend installing the machines on any other weak-supported flooring such as soft tiles or carpeting as those machines’ weight can damage the floor.
Once you have your device’s components with you, it’s time to get to work. Go through the manufacturer’s instructions carefully as you may be unfamiliar with some new features or accessories that never came with your previous or outdated model. If you want, you can seek professional help from ballymore homes.
Take Electricity into Account
The kind of outlet required for your washing machine might depend on its specifications. Typically, you’ll need a 120-volt outlet that provides ground fault protection. This offers an extra line of protection against faults or other electrical issues and interruptions.
If you don’t have that, it’s not hard to replace that outlet with a GFCI. You might need to change the breaker to match the appliances’ specifications.
For example, the electric dryer needs an outlet of 240 volts controlled by a set of dedicated breakers that measure between 30 to 50 amps, based on the dryer’s specifications. But if you aren’t that experienced with electricity, you should leave the task of having a 240-volt dryer circuit installed to a professional electrician.
Also, be sure that your house’s power is 100% turned off before installing your washer and dryer.
Check the Water Supply
Check to see if your washing machine is close to your water heater so that you can use its inlet and outlet lines for both hot and cold water supply. If it isn’t, then go to the closest 3/4 inch primary cold and hotlines. Then tie it together using 3/4 inch by 1/2 inch tees before running the lines to the wall that’s right behind your washing machine.
Each line should have a shut-off valve at the end of it that is securely attached to the wall framing right on your washer’s top for quick and straightforward access. Plumbers usually have the supply lines terminated using a washing machine box. That box includes the standpipe’s opening and the valves.
Install the Dryer
If you’re moving to a new house, ensure that the dryer vent doesn’t have any debris as it could lead to a fire hazard. Many home improvement stores provide you with an affordable vent brush. Beginning from the indoors, insert the vent brush just a few inches in and then start spinning before removing it to clean the bristles. Keep doing this until the bristles are no longer getting dirty.
Once you’re done cleaning the vent’s indoor side, go to the outside and take out the vent hood to see if there isn’t any debris or lint inside. Be sure to clean the vent every 2 years to avoid any blockage issues.
Now you’re ready to place the dryer in the area you want it to be. Sure there’s sufficient space between the dryer so you can comfortably hook the vent hose to the wall.
Attach the vent duct or hose to your machine. Place one end of the hose over the hole in the dryer’s back. Now attach the duct or hose to the wall vent. Finally, plug the dryer and have it moved to its final spot.
Install the Washer
Before installing your washing machine:
- Run some water beneath the cold and hot water outlets to clear out any debris that could block your valve screens.
- Move the washing machine into space; you want to keep it in.
- Ensure there is enough base to navigate either one of the washing machine’s sides or even behind to hook the water supplies up.
Then attach both the water supply hoses to the appropriate faucets, as in the water hose, which is very cold, is connected directly with the cold water faucet. The hose of hot water is directly connected to the hot one. Have the water hoses attached to the cold and hot water inlets on the washing machine’s back.
Now turn the water on and see if there aren’t any leaks. Find that there are leaks, turn off the water supply and inspect whether the couplings are fitted tightly and threaded correctly.
Take the drain hose and connect it to the washing machine. The holes should screw onto the water outlet, just like the hoses. Now get the drain hose to run to the drain receptacle. Finally, plug your washing machine into the electrical outlet and move it against your wall if you have to.