Hi Boox Popular Magazine 2024
The COVID-19 pandemic has left all of us stuck in our homes, but that doesn’t mean we can’t be productive, right? If you’ve been interested to try out woodworking or have been doing it for a while now, it’s the perfect time to learn new woodworking skills and accomplish new projects. For newbies, you might want to learn about setting up your own woodshop at home (here’s a quick guide) and learn a bit more about the basics of the craft. Afterward, you’ll be ready to take on these intermediate projects that will keep you occupied for a few days and will leave you feeling accomplished afterward.
Replacing a Wood Baseboard
Baseboards are protective finish elements, which protect the bottom of the walls that are most likely to receive a significant amount of wear. In many older homes baseboards were thick and often the edges of the boards were joined in such a fashion that the baseboard is one effective unit. Using the simple tips and tricks in this article you can learn how to remove and repair or replace any baseboard.
To begin to remove the baseboard take a pry bar and wiggle the teeth of one end of the pry bar on top of and ultimately behind the baseboard. At this point, you are not trying to pry the board away from the wall as much as you are just trying to get enough room behind the board that you can insert a small piece of scrap wood that you can pry against to protect the wall. Once you have enough room and a piece of scrap wood inserted begin to pry the top of the board and work left and right prying a little bit as you go.
If as you are prying, you notice that the baseboard is one solid piece, you can cut the baseboard with the tip of a saw. Insert two wood blocks behind the section that you wish to cut. This will cause the baseboard to bow out away from the wall at that point. Begin to make a vertical cut, holding the saw at an approximate 45-degree angle as you cut. Let the tip of the blade work for you as you cut.
Once you have a length of board sufficiently pried away from the wall you can remove it being careful not to bend, break, or split the board. Once the board is removed you should remove the nails through the back of the board so that you won’t crack the face of the baseboard.

To install a new baseboard back, first ensure that the wall is clean and any previous caulk or wood putty is removed. Next layout the new baseboard, and measure and mark the board according to the distance that you will need to bridge on the wall. If the previous piece of baseboard was mitered you will need to cut the end of the new baseboard at a 45-degree angle. Then using a coping saw you will need to cut the end of the board to match the profile and contour of the other piece of molding that you are going to place the new baseboard against. While this might seem challenging, it isn’t really, because if you make a mistake you can often fill the void with wood putty or even paintable caulk, if you plan to paint the baseboards.
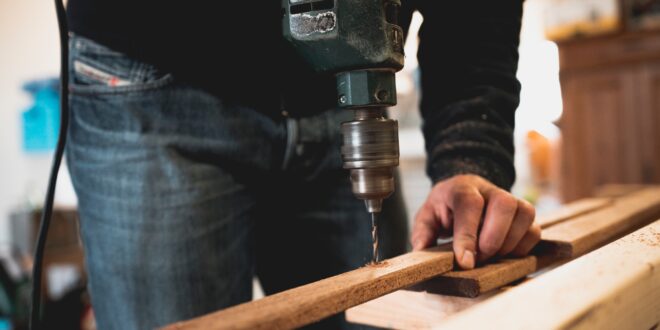
Once you have dry-fit the boards, you should then drill several small pilot holes on the face of the new board. The reason to drill pilot holes is to prevent the new baseboard from splitting when you go to nail it back on the wall. Place the baseboard against the wall and insert nails into the pilot holes and nail the baseboard back onto the wall. Try to space your nails so that they will hit the studs behind the baseboard. When finished hit each of the nail heads with a nail set, to countersink the nail heads. Then fill the nail head holes with either wood putty or paintable caulk to hide them.
DIY Cowboy Chic Iron Boot and Wood Lamp
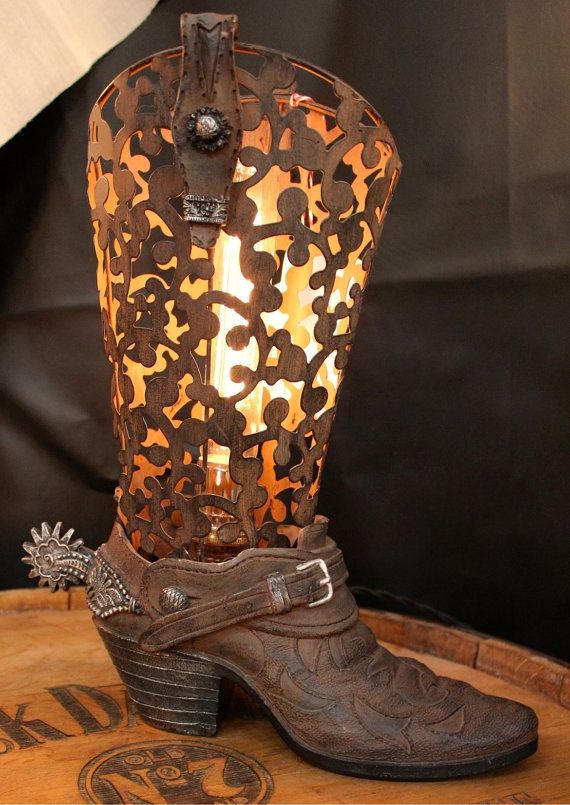
This unique iron boot and wood lamp looks fantastic in any “Cowboy Chic” living space, and is very simple and very inexpensive to create! Use as a gift, or in your own home. With paint drying time, this project should take just under an afternoon to complete.
For this project, you will need:
– Unfinished Wooden box, at least 6″ high x 6″ wide
– Medium grit sandpaper
– Tack cloth
– Drill with 3/4″ bit
– Krylon® Interior Exterior Paint, in Equestrian
– Small hammer
– Eight carpentry nails
– Four Iron Boot decals (like those found here at Texican Treasures)
– Newspaper
– Lamp kit
– Hacksaw
– Wire stripper
To begin, lightly sand your wooden box with medium-grit sandpaper. Wipe off any excess dust with a tack cloth. Using a drill with a 3/4″ bit, drill a hole through the top of the box and through the bottom. Using Krylon® Interior Exterior Paint in Equestrian, coat the outside of the box thoroughly with two coats and allow it to dry completely. Hammer the four iron boots into each side of the box with carpentry nails.
Thread the cord through both holes in the box
Your lamp kit should include a lamp rod. Measure the rod and cut it with a hacksaw so that it is 1″ above the height of the box. Thread the cord from the inside of the box through the rod. Set the rod in the center of the box, and run through both holes so it sits flat.
Thread the locknut onto the lamp rod, and pull the cord through at least three inches. Screw the lamp neck onto the rod. Repeat with the harp bottom and socket cap, making sure all are tight.
Pull the cord apart two inches. Using a knife or wire stripper, remove 1/2″ of insulation from the wire. Do not cut the wire itself. Hold the wire so that the pieces are in a “y” position. Following the shape of the “y”, make a loop of each end of the wire, holding the end of one loop in front of the joined cord and the end of the other loop at the back of the joined cord. Slip each end through the loop formed by the opposing wire and tighten the knot. Pull-on the plug end of the lamp cord at the base of the lamp so that the knot fits against the socket cap.
Using the directions that came with your lamp kit, find the neutral and hot wires. Connect the neutral wire to the silver screw on the socket. Connect the hot wire to the gold screw. Make sure both are tight.
Place the socket shell over the lamp socket. Pull the plug cord out from the box base until the cord is pulled back into the lamp, and stays in place. Make sure the shell is locked in place. Raise the sleeves on the harp and gently squeeze while inserting into the harp bottom. Lower the harp sleeves to secure. Add a matching tan shade to complete the look.